
The Inevitable Loss: My First Bonsai’s Demise
I’ll never forget the day I brought home my first bonsai. It was a tiny little juniper, its branches carefully wired and sculpted into a miniature version of a windswept tree clinging to a mountainside. I remember thinking, “This is it. I’m officially a bonsai artist.” Naive, I know. But the excitement was real. What I didn’t realize then was that I was about to embark on a journey filled with more heartbreak and lessons than I could have ever imagined.
It wasn’t long before things started to go wrong. The needles began to turn brown, then brittle. The vibrant green faded to a dull, sickly yellow. I watered it religiously, or so I thought, and kept it on a sunny windowsill. I followed all the instructions I could find online, but nothing seemed to help. It was like watching a tiny, living thing slowly wither away before my very eyes. The truth is, I was loving it to death – a common mistake among beginners.
The inevitable finally happened. The entire tree turned brown, the needles fell off, and the branches became brittle. My first bonsai was dead. I felt a profound sense of failure, almost like I had lost a pet. It was more than just a plant; it was a symbol of my aspirations, my attempt to connect with nature and create something beautiful. I felt defeated, but deep down, I knew this wasn’t the end. It was just the beginning of my education.
The Post-Mortem Analysis: What Went Wrong?
After the initial wave of disappointment subsided, I decided to do some serious soul-searching and research. I needed to understand why my first attempt had failed so miserably. I started by re-examining the advice I had followed and comparing it to what more experienced bonsai artists were saying. It became clear that there was a lot of conflicting information out there, and I had fallen victim to some common misconceptions.
One of the biggest mistakes I made was overwatering. I had read that bonsai trees need regular watering, but I didn’t understand the importance of drainage. The soil was constantly soggy, which suffocated the roots and led to root rot. I also hadn’t paid enough attention to the type of soil I was using. Bonsai trees need a well-draining soil mix that allows air to circulate around the roots. I was using regular potting soil, which was too dense and retained too much moisture.
Another crucial error was my understanding of sunlight. While bonsai trees need sunlight, they don’t necessarily need direct sunlight all day long. My juniper was getting blasted by the afternoon sun, which was likely scorching the needles and drying out the soil too quickly (even though I was overwatering it – the irony!). I needed to find a spot with filtered sunlight or provide some shade during the hottest part of the day.
Finally, I realized I hadn’t paid enough attention to the specific needs of my juniper. Different species of bonsai trees have different requirements for watering, sunlight, and fertilization. I had treated my juniper like a generic houseplant, without taking into account its unique characteristics. It was a harsh lesson, but one that I desperately needed to learn.
The Soil Secret: Understanding Bonsai Soil Composition
My first major breakthrough came when I started to truly understand the importance of soil. It wasn’t just dirt; it was the lifeblood of the bonsai. It needed to provide drainage, aeration, and nutrients, all while supporting the delicate root system. After countless hours of research and experimentation, I finally discovered the ideal soil mix for my climate and the types of bonsai I wanted to grow.
The foundation of any good bonsai soil mix is drainage. Bonsai pots are typically shallow, which means the soil can easily become waterlogged. This can lead to root rot, which is a death sentence for most bonsai trees. To ensure proper drainage, I started using a mix of akadama, pumice, and lava rock. Akadama is a type of clay that provides good drainage and aeration, while pumice and lava rock further improve drainage and add weight to the soil, preventing the tree from tipping over. I also learned about different particle sizes and how to adjust the mix based on the specific needs of each tree.
But drainage isn’t the only factor to consider. Bonsai soil also needs to provide adequate aeration. Roots need oxygen to survive, and a dense, compacted soil can suffocate them. The akadama, pumice, and lava rock in my mix helped to create air pockets in the soil, allowing the roots to breathe. I also learned to avoid using fine particles that could clog up the soil and reduce aeration.
Finally, bonsai soil needs to provide essential nutrients to the tree. While regular fertilization is important, the soil itself should also contain some nutrients. I added a small amount of organic matter to my mix, such as compost or well-rotted manure, to provide a slow-release source of nutrients. However, I was careful not to add too much organic matter, as this could make the soil too dense and retain too much moisture.
The Art of Watering: More Than Just H2O
Watering seems like such a simple task, but it’s actually one of the most critical aspects of bonsai care. I quickly learned that there’s a big difference between watering and *properly* watering a bonsai. It’s not just about dumping water on the soil; it’s about understanding the tree’s needs and providing the right amount of moisture at the right time.
The first thing I learned was to check the soil moisture before watering. I used to water my bonsai on a fixed schedule, regardless of whether it needed it or not. This led to overwatering and root rot. Now, I always check the soil moisture by sticking my finger into the soil. If the top inch or two feels dry, it’s time to water. If it still feels moist, I wait a day or two and check again.
When it comes to watering, I aim for thoroughness. I water the bonsai slowly and evenly, making sure to saturate the entire soil mass. I continue watering until water drains freely from the bottom of the pot. This helps to flush out any accumulated salts and toxins from the soil. I also avoid watering the foliage, as this can promote fungal diseases. Instead, I focus on watering the soil directly.
The type of water you use can also make a difference. Tap water often contains chlorine and other chemicals that can be harmful to bonsai trees. I prefer to use rainwater or filtered water whenever possible. If I have to use tap water, I let it sit out for 24 hours to allow the chlorine to evaporate. Another helpful tip is to use a watering can with a fine rose spout. This helps to distribute the water evenly and gently, preventing soil erosion.
Light and Location: Finding the Perfect Spot
Finding the right location for your bonsai is crucial for its health and well-being. Different species of bonsai trees have different light requirements, so it’s important to understand the needs of your particular tree. My juniper, for example, needed plenty of sunlight, but not too much direct afternoon sun. I experimented with different locations until I found a spot that provided the ideal balance of light and shade.
For indoor bonsai, a sunny windowsill is often the best option. However, it’s important to monitor the temperature and humidity. Windowsills can get very hot in the summer and very cold in the winter. I used a thermometer and hygrometer to keep track of the conditions and made adjustments as needed. I also used a humidifier to increase the humidity, especially during the winter months when the air is dry.
Outdoor bonsai need even more attention to location. They need protection from extreme weather conditions, such as frost, snow, and intense heat. I built a small shade structure to protect my bonsai from the afternoon sun. I also brought them indoors during the winter to protect them from freezing temperatures. I learned that the best location for a bonsai is one that mimics its natural environment as closely as possible.

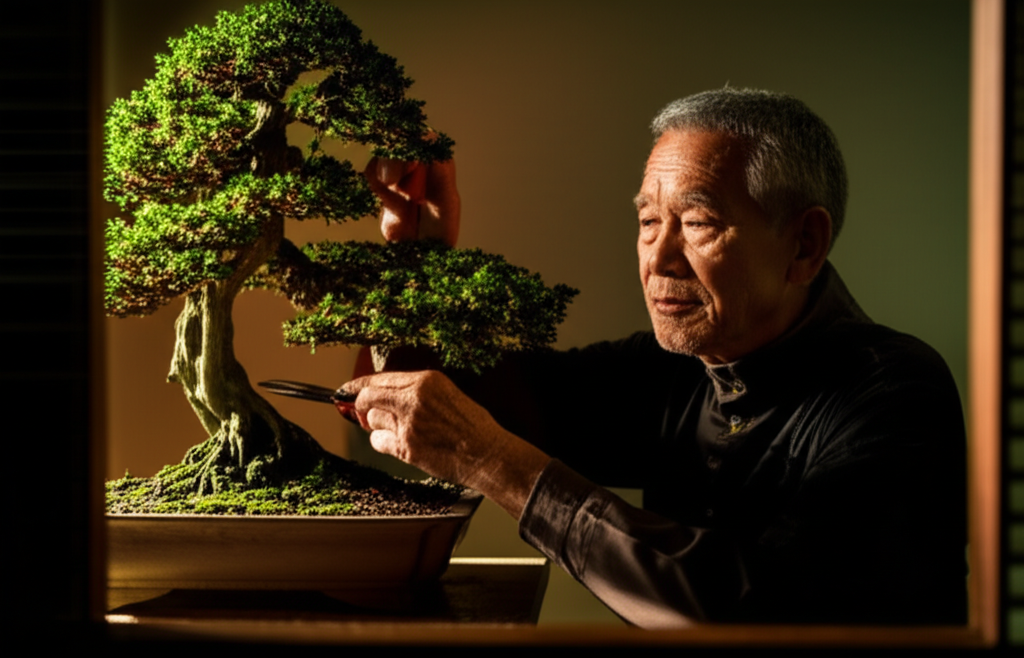
The Art of Pruning: Shaping the Miniature World
Pruning is one of the most important techniques in bonsai care. It’s how we shape the tree, control its growth, and maintain its health. When I first started, I was afraid to prune my bonsai. I thought I would damage it or ruin its shape. But I quickly learned that pruning is essential for creating a beautiful and healthy bonsai.
There are two main types of pruning: structural pruning and maintenance pruning. Structural pruning is done to establish the basic shape of the tree. It involves removing large branches that are growing in the wrong direction or that are too thick or crowded. Maintenance pruning is done to maintain the shape of the tree and control its growth. It involves removing small branches, twigs, and leaves that are growing out of place or that are shading other parts of the tree.
When pruning, it’s important to use sharp, clean tools. Dull tools can crush the branches and make them more susceptible to disease. I use a pair of sharp bonsai shears for most of my pruning. For larger branches, I use a branch cutter. I also use a knob cutter to remove small stubs that are left after pruning. It’s also crucial to understand apical dominance. The terminal bud of a branch produces hormones that inhibit the growth of lateral buds. Removing the terminal bud encourages the growth of lateral buds, resulting in a bushier, more compact tree.
Fertilizing: Feeding Your Tiny Friend
Like any living thing, bonsai trees need nutrients to thrive. Fertilizing provides those nutrients, but it’s important to do it correctly. Over-fertilizing can be just as harmful as under-fertilizing. I experimented with different types of fertilizers and application methods until I found what worked best for my trees.
I primarily use organic fertilizers, such as fish emulsion and seaweed extract. These fertilizers are slow-release, which means they provide nutrients gradually over time. They also contain micronutrients that are essential for plant health. I also use a small amount of chemical fertilizer, such as a balanced NPK fertilizer (nitrogen, phosphorus, and potassium), to provide a quick boost of nutrients when needed.
The timing of fertilization is also important. I fertilize my bonsai trees during the growing season, which is typically from spring to fall. I avoid fertilizing during the winter when the trees are dormant. I also adjust the amount of fertilizer based on the tree’s growth rate. If the tree is growing rapidly, I fertilize more frequently. If it’s growing slowly, I fertilize less frequently.
One thing I learned the hard way is to never fertilize a dry bonsai. Always water the tree thoroughly before fertilizing. This helps to prevent fertilizer burn, which can damage the roots. I also avoid fertilizing newly repotted bonsai trees. The roots need time to recover before they can absorb nutrients.
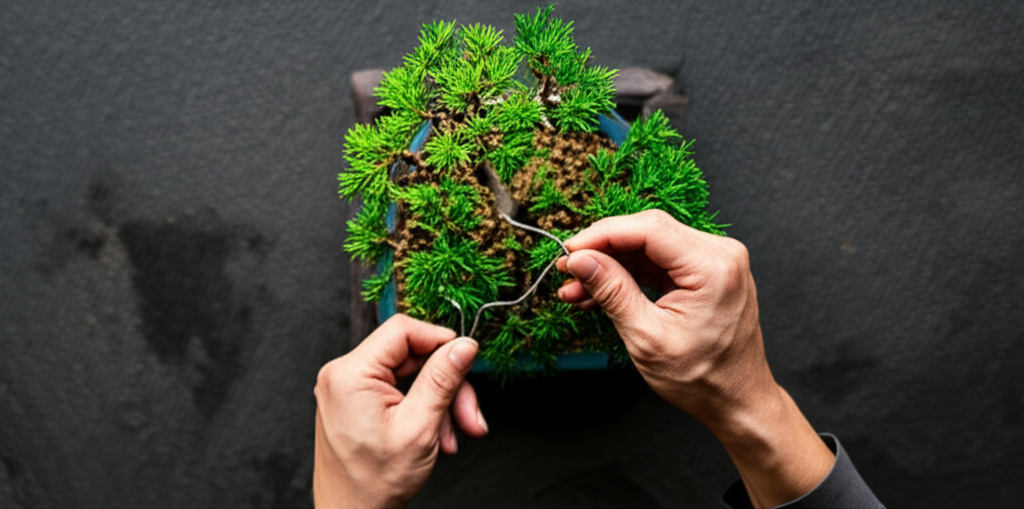
Wiring: Guiding Growth with Gentle Force
Wiring is a technique used to shape the branches of a bonsai tree. It involves wrapping wire around the branches and bending them into the desired position. When I first saw a bonsai tree with wired branches, I thought it looked unnatural and even cruel. But I soon learned that wiring is a gentle and effective way to guide the growth of a bonsai tree.
There are two main types of wire used for bonsai: aluminum wire and copper wire. Aluminum wire is softer and easier to bend, making it ideal for beginners. Copper wire is stronger and holds its shape better, making it ideal for more experienced bonsai artists. I started with aluminum wire and gradually transitioned to copper wire as I gained more experience.
When wiring a branch, it’s important to wrap the wire at a 45-degree angle. This provides the most support and prevents the wire from cutting into the bark. I also make sure to use the correct gauge of wire. Too thin of a wire won’t hold the branch in place. Too thick of a wire can damage the bark. It’s also crucial to monitor the wire closely. As the branch grows, the wire can start to cut into the bark. If this happens, I remove the wire immediately and re-wire the branch with a larger gauge of wire or a different technique.
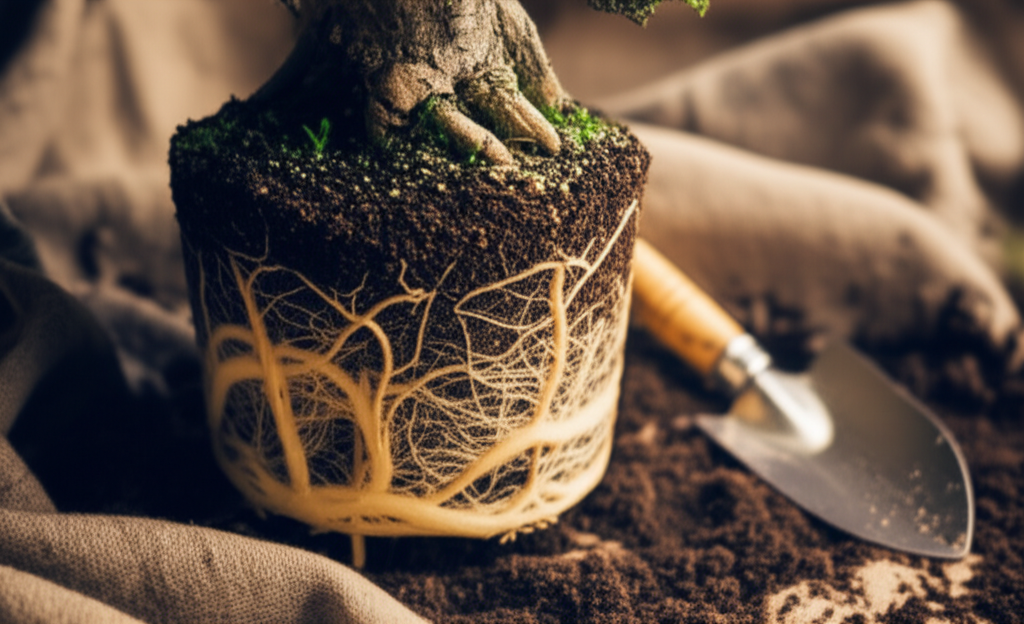
Repotting: Giving Your Bonsai a Fresh Start
Repotting is the process of removing a bonsai tree from its pot, trimming the roots, and replanting it in fresh soil. It’s an essential part of bonsai care, as it allows us to control the size of the root system and replenish the nutrients in the soil. When I first started, I was terrified of repotting my bonsai. I thought I would damage the roots and kill the tree. But I soon learned that repotting is a necessary and even beneficial process.
The frequency of repotting depends on the age and species of the bonsai tree. Young trees typically need to be repotted every one to two years, while older trees can be repotted every three to five years. The best time to repot is in the early spring, just before the growing season begins. This gives the tree time to recover before it starts to grow again.
When repotting, I carefully remove the bonsai tree from its pot. I use a chopstick or a root hook to loosen the soil around the roots. I then gently tease the roots apart, removing any dead or diseased roots. I also trim the roots back by about one-third, being careful not to remove too many roots at once. I then replant the bonsai tree in fresh soil, making sure to fill in any air pockets around the roots. After repotting, I water the bonsai tree thoroughly and keep it in a shaded location for a few weeks to allow it to recover.
Patience and Observation: The Keys to Success
More than any specific technique or product, the most important thing I learned about bonsai care is the importance of patience and observation. Bonsai is not a quick or easy hobby. It requires a lot of time, effort, and dedication. It also requires a keen eye for detail and a willingness to learn from your mistakes.
I learned to observe my bonsai trees closely, paying attention to their growth patterns, leaf color, and overall health. I learned to identify problems early on, before they became serious. I also learned to be patient and to allow the trees to develop at their own pace. Bonsai is not about forcing a tree to grow in a certain way; it’s about working with the tree to create something beautiful and harmonious.
There were times when I felt discouraged and wanted to give up. But I kept reminding myself that bonsai is a journey, not a destination. It’s about the process of learning, growing, and connecting with nature. And even though my first bonsai died, it taught me valuable lessons that I will never forget. It was a difficult but ultimately rewarding experience that shaped me into the bonsai artist I am today.
So, if you’re thinking about getting into bonsai, don’t be afraid to make mistakes. Everyone starts somewhere, and the most important thing is to learn from your experiences. Be patient, be observant, and never stop learning. And remember, even if your first bonsai dies, it doesn’t mean you’re a failure. It just means you’re one step closer to becoming a true bonsai artist. It’s a long road, filled with challenges and rewards, but the journey itself is what makes it all worthwhile. Embrace the process, learn from your mistakes, and most importantly, enjoy the beauty and tranquility that bonsai can bring to your life.
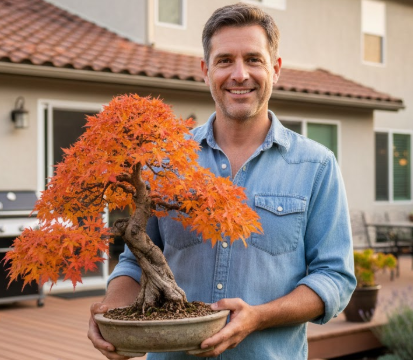
My name is Christopher Brown, I am 38 years old and I live in the United States. I am deeply passionate about the art of bonsai and have been cultivating trees for several years. What started as a simple curiosity turned into a daily practice and an important part of my life.
On this blog, I share my real experiences with bonsai — including what works, what doesn’t, and the lessons I learn along the way. I enjoy experimenting with techniques, observing the growth of each tree, and documenting the process with honesty and patience.
My goal with InfoWeHub is to help beginners feel more confident, avoid common mistakes, and discover the beauty of bonsai cultivation. If you are starting your journey or already love this art, you are welcome here.