
Understanding Bonsai Pruning: My Journey Begins
For decades now, the art of bonsai has captivated me. It’s more than just gardening; it’s a dance between patience, precision, and profound respect for nature. And at the heart of this dance lies the critical skill of pruning. I remember when I first started, armed with enthusiasm but lacking the finesse, my poor little maple bonsai looked more like it had been attacked by a hedge trimmer than lovingly shaped. It was a harsh lesson, but a valuable one. Pruning, I quickly learned, isn’t just about cutting; it’s about guiding, nurturing, and understanding the language of the tree.
Think of your bonsai as a living sculpture. Each snip, each cut, contributes to the overall design, health, and longevity of the tree. It’s a continual process of refinement, a conversation between you and the plant. And just like any good conversation, it starts with understanding the basics.
The Two Pillars of Bonsai Pruning: Maintenance and Structural
Before you even think about picking up your shears, it’s essential to understand the two main types of pruning we use in bonsai: maintenance pruning and structural pruning. These serve fundamentally different purposes and are performed at different times of the year.
Maintenance Pruning: The Gentle Touch
Maintenance pruning, as the name suggests, is all about maintaining the existing shape and health of your bonsai. It’s the regular trimming and pinching we do throughout the growing season to control growth, encourage ramification (the development of finer branching), and remove unwanted foliage. I often compare it to getting a regular haircut – keeping things tidy and in shape.
This type of pruning is generally less aggressive and focuses on removing new growth that disrupts the desired silhouette. For example, if a branch is growing too long or is sticking out in an undesirable direction, a quick snip will redirect its energy and maintain the tree’s overall form. Think of it as fine-tuning the bonsai’s appearance. I remember one summer, I was so focused on structural work that I neglected the maintenance pruning. The result? A tangled mess of new growth that took me weeks to correct. Lesson learned: consistent maintenance is key!
Structural Pruning: The Bold Vision
Structural pruning, on the other hand, is a more significant undertaking. This type of pruning involves making larger cuts to reshape the tree, create new branch structures, or correct major flaws in the design. It’s like renovating a house – a more involved process that requires careful planning and execution.
This is where you really start to influence the overall character and style of your bonsai. By removing entire branches or significantly shortening others, you can create dramatic changes in the tree’s form. This is often done in the late winter or early spring, before the growing season begins, allowing the tree to recover and heal before putting out new growth. Structural pruning requires a confident hand and a clear vision. Before making any major cuts, I always spend a significant amount of time studying the tree, visualizing the desired outcome, and considering the long-term implications of my actions. It’s a big responsibility, but also incredibly rewarding when you see the results.
Essential Tools for the Bonsai Pruner: An Investment in Art
Just as a painter needs brushes and a sculptor needs chisels, the bonsai artist needs the right tools. And trust me, using the right tools makes a world of difference. I learned this the hard way, initially trying to use regular garden shears. The result was torn bark, crushed branches, and a very unhappy tree. Investing in quality bonsai tools is an investment in the health and beauty of your bonsai.
Here are a few essential tools that I always keep in my bonsai toolkit:
- Concave Cutters: These are arguably the most important tool for bonsai pruning. Their concave blades allow you to make clean, recessed cuts that promote faster healing and minimize scarring. They are essential for removing branches and creating a natural look.
- Branch Cutters: These are used for removing larger branches that are too thick for concave cutters. Look for cutters with sharp, strong blades that can make clean cuts without crushing the branch.
- Bonsai Shears: These are smaller, more delicate shears used for maintenance pruning, such as trimming new growth and removing leaves. They are ideal for precision work and creating a refined look.
- Root Rake: While primarily used for root pruning, a root rake can also be useful for teasing apart tangled foliage and removing dead leaves from the interior of the tree.
- Wire Cutters: Essential for removing training wire without damaging the branches.
Beyond the tools themselves, remember to keep them clean and sharp! I always clean my tools after each use with rubbing alcohol to prevent the spread of disease. And I regularly sharpen the blades to ensure clean, precise cuts. A sharp tool is a safe tool, and it will also make the pruning process much easier and more enjoyable.
Step-by-Step Pruning Techniques: A Practical Guide
Now that we’ve covered the basics, let’s dive into some specific pruning techniques that you can use to shape and maintain your bonsai.
1. Identifying Unwanted Growth: The First Step to Mastery
Before you start cutting, take a close look at your bonsai and identify any unwanted growth. This includes:
- Dead or Diseased Branches: These should be removed immediately to prevent the spread of disease and improve the overall health of the tree.
- Crossing Branches: Branches that rub against each other can create wounds that are susceptible to infection. Remove one of the crossing branches to improve airflow and prevent damage.
- Suckers and Watersprouts: These are vigorous, upright shoots that emerge from the base of the tree or from existing branches. They are often a sign of stress and can detract from the overall shape of the bonsai. Remove them as soon as you see them.
- Branches Growing in Undesirable Directions: This includes branches that are growing straight up, straight down, or directly towards the viewer. These branches can disrupt the desired silhouette and create a cluttered look.
- Overly Thick or Clustered Growth: Too much foliage can block sunlight and air circulation, leading to weakened growth and increased susceptibility to disease. Thin out dense areas to improve airflow and light penetration.
I like to use a small piece of colored string to mark the branches I intend to remove. This helps me visualize the final result and ensures that I don’t accidentally cut off a branch that I want to keep. It’s a simple trick, but it can save you from making costly mistakes.
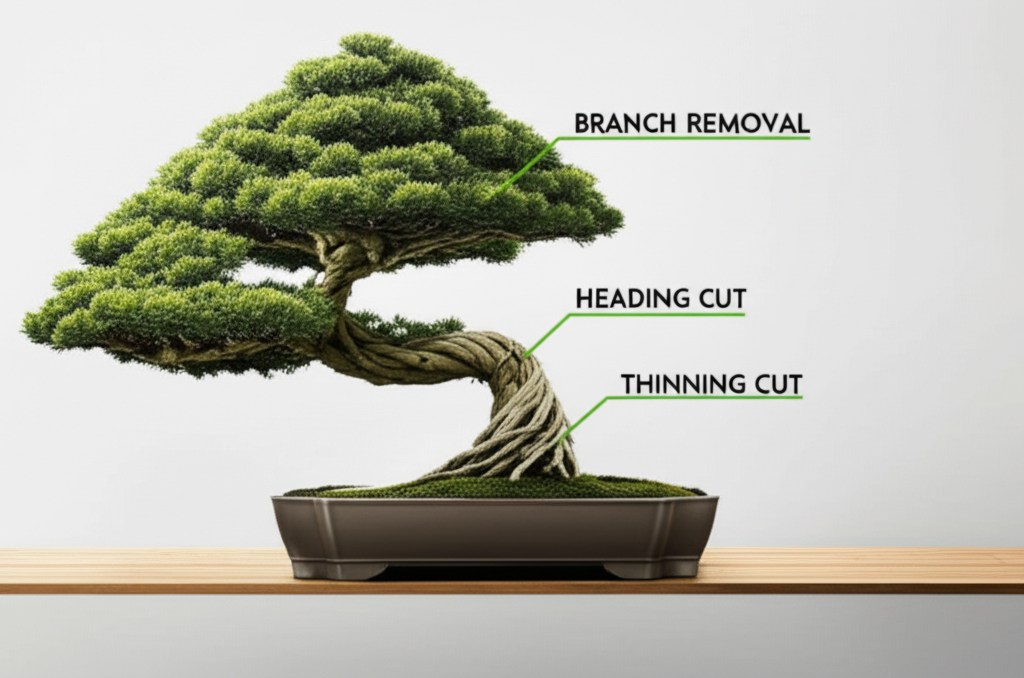
2. Making the Cut: Precision and Cleanliness
When making a cut, it’s important to use the right tool and the right technique. Always use sharp tools to make clean cuts. Dull tools can crush the branches and make them more susceptible to infection.
For small branches, use bonsai shears to make a clean cut at a slight angle, just above a node (the point where a leaf or branch emerges from the stem). This will encourage new growth to emerge from that node.
For larger branches, use concave cutters to make a recessed cut that is flush with the trunk or parent branch. The concave shape of the cut will promote faster healing and minimize scarring. Be careful not to leave a stub, as this can rot and create an entry point for disease. I remember once, being impatient, I left a small stub. It ended up becoming a haven for pests and almost cost me the entire tree. Now, I always make sure the cut is perfectly flush.
After making a cut, you can apply a wound sealant to protect the exposed tissue from infection and promote faster healing. This is especially important for larger cuts.
3. Pinching: Encouraging Ramification
Pinching is a technique used to control the growth of new shoots and encourage ramification. It involves removing the terminal bud (the growing tip) of a new shoot with your fingers or with small bonsai shears. This redirects the tree’s energy to the lateral buds, causing them to sprout and create more branching.
Pinching is best done during the growing season, when the new shoots are still soft and pliable. Simply grasp the terminal bud between your thumb and forefinger and gently twist it off. You can also use bonsai shears to make a clean cut just above a pair of leaves.
Pinching is a great way to create a dense, compact foliage pad and improve the overall appearance of your bonsai. It’s a tedious process, but the results are well worth the effort.
Pruning Different Bonsai Species: Adapting to the Individual
While the basic principles of bonsai pruning apply to all species, there are some important differences to consider depending on the type of tree you are working with. Each species has its own unique growth habits and responds differently to pruning.
Deciduous Trees: Shaping the Silhouette
Deciduous trees, such as maples, elms, and beeches, are typically pruned during the dormant season (late winter or early spring) when the leaves have fallen. This allows you to clearly see the branch structure and make informed decisions about which branches to remove.
The goal of pruning deciduous trees is to create a well-defined silhouette with balanced branching. Remove any dead, diseased, or crossing branches, as well as any branches that are growing in undesirable directions. Thin out dense areas to improve airflow and light penetration. Encourage ramification by pinching new shoots during the growing season.
Deciduous trees also respond well to defoliation, a technique that involves removing all of the leaves from the tree in mid-summer. This encourages a new flush of smaller leaves, which can improve the overall appearance of the bonsai. However, defoliation should only be done on healthy, vigorous trees, and it should not be done every year.
Coniferous Trees: Preserving the Needle Structure
Coniferous trees, such as junipers, pines, and spruces, are typically pruned in the fall or early winter, after the growing season has ended. The goal of pruning coniferous trees is to maintain their characteristic needle structure and create a natural, windswept look.
Unlike deciduous trees, coniferous trees do not readily bud back from old wood, so it’s important to be careful not to cut back too far. Focus on removing dead or diseased needles, as well as any branches that are growing in undesirable directions. Thin out dense areas to improve airflow and light penetration. Pinch new shoots to encourage ramification, but be careful not to remove too many needles, as this can weaken the tree.
Pines require a specialized pruning technique called needle plucking, which involves removing a portion of the needles from each shoot to control growth and improve the tree’s appearance. This is typically done in the fall, after the needles have hardened off.
Flowering and Fruiting Trees: Timing is Everything
Flowering and fruiting trees, such as azaleas, cherries, and crabapples, require special attention when pruning to ensure that you don’t remove the flower buds. The timing of pruning will depend on whether the tree flowers on old wood or new wood.
Trees that flower on old wood (such as azaleas) should be pruned immediately after flowering. This allows the tree to produce new growth and set flower buds for the following year. Avoid pruning these trees in the late summer or fall, as this can remove the flower buds.
Trees that flower on new wood (such as crape myrtles) can be pruned in the late winter or early spring. This will encourage new growth and abundant flowering. Remove any dead, diseased, or crossing branches, as well as any branches that are growing in undesirable directions. Thin out dense areas to improve airflow and light penetration.

Common Pruning Mistakes and How to Avoid Them: Learning from Experience
Over the years, I’ve made my fair share of pruning mistakes. It’s part of the learning process. But by understanding the common pitfalls, you can avoid making the same mistakes and improve your bonsai pruning skills.
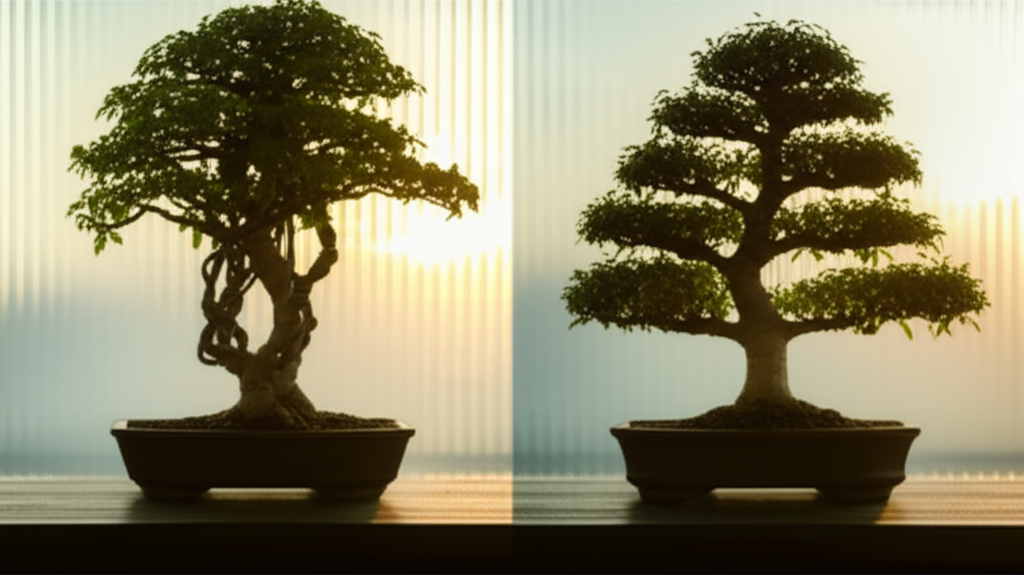
1. Pruning Too Much or Too Little: Finding the Balance
One of the most common mistakes is pruning too much or too little. Over-pruning can weaken the tree and make it more susceptible to disease. Under-pruning can result in a tangled, overgrown mess. The key is to find a balance between these two extremes.
When in doubt, it’s always better to prune too little than too much. You can always go back and remove more later, but you can’t undo a cut. Start by removing the most obvious unwanted growth, such as dead or diseased branches, and then gradually work your way towards the desired shape.
Pay attention to the tree’s response to pruning. If it starts to produce weak or spindly growth, it may be a sign that you are pruning too much. If it continues to produce vigorous growth, you may need to prune more aggressively.
2. Using the Wrong Tools: Investing in Quality
As I mentioned earlier, using the wrong tools can damage your bonsai and make the pruning process much more difficult. Invest in quality bonsai tools and keep them clean and sharp. This will not only make pruning easier, but it will also help prevent the spread of disease.
Avoid using regular garden shears or pruners, as these can crush the branches and tear the bark. Instead, use concave cutters, branch cutters, and bonsai shears specifically designed for bonsai pruning.
3. Neglecting Wound Care: Protecting the Tree
After making a cut, it’s important to protect the exposed tissue from infection and promote faster healing. Apply a wound sealant to larger cuts to prevent the entry of disease organisms. I learned this the hard way when a poorly sealed cut led to a fungal infection that nearly killed a prized Japanese maple.
Keep the area around the cut clean and dry. Avoid watering the foliage directly after pruning, as this can create a moist environment that encourages the growth of fungi and bacteria.
4. Ignoring the Tree’s Natural Growth Habit: Respecting the Species
Each bonsai species has its own unique growth habit. Trying to force a tree into a shape that is unnatural for its species can lead to stress and weakened growth. Take the time to learn about the growth habits of your bonsai species and prune accordingly.
For example, junipers are naturally windswept and cascading, while pines are more upright and formal. Prune your bonsai to enhance its natural characteristics, rather than trying to force it into a shape that it doesn’t want to be.
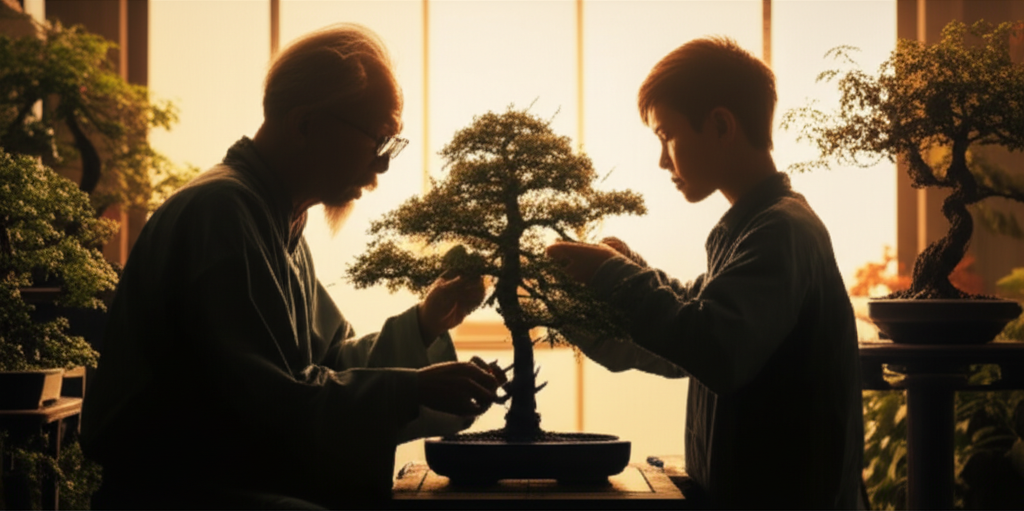
The Art of Patience: Bonsai Pruning as a Lifelong Journey
Bonsai pruning is not a one-time event, but rather an ongoing process of refinement. It takes time, patience, and a keen eye to develop the skills necessary to create a truly beautiful bonsai. Don’t be discouraged if you make mistakes along the way. Every mistake is a learning opportunity.
The most important thing is to keep learning and experimenting. Read books, watch videos, and attend workshops to learn new techniques. Talk to other bonsai enthusiasts and share your experiences. And most importantly, spend time with your trees. Observe their growth habits, study their branch structure, and listen to what they are telling you.
I’ve been practicing bonsai for decades, and I’m still learning new things every day. It’s a lifelong journey, but it’s a journey that is filled with beauty, wonder, and a deep connection to nature. And that, for me, is what makes bonsai so rewarding.
Ultimately, bonsai pruning is more than just a set of techniques; it’s an art form. It’s a way of expressing your creativity and your love for nature. So, take your time, be patient, and enjoy the process. The rewards will be well worth the effort. The feeling of shaping a living tree, of guiding its growth and bringing out its inner beauty, is truly unmatched.
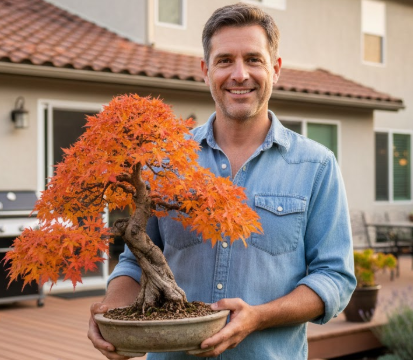
My name is Christopher Brown, I am 38 years old and I live in the United States. I am deeply passionate about the art of bonsai and have been cultivating trees for several years. What started as a simple curiosity turned into a daily practice and an important part of my life.
On this blog, I share my real experiences with bonsai — including what works, what doesn’t, and the lessons I learn along the way. I enjoy experimenting with techniques, observing the growth of each tree, and documenting the process with honesty and patience.
My goal with InfoWeHub is to help beginners feel more confident, avoid common mistakes, and discover the beauty of bonsai cultivation. If you are starting your journey or already love this art, you are welcome here.