In my 30 years behind the bar and in the roasting lab, I have witnessed many “magic moments” in coffee. But none are as rewarding—or as frustrating—as the process we call “dialing-in.” To the uninitiated, making an espresso looks like pushing a button. To a professional, it is a high-stakes calculation involving thermodynamics, fluid dynamics, and sensory precision.
When I first started in the early 90s, we didn’t have the digital scales or the flow-profile machines we have today. We relied entirely on our eyes and our “gut.” But as The Third Wave Defined: My Witness Account of the Specialty Shift brought science to the forefront, we realized that espresso is the most volatile brewing method in existence. A change of one degree in Water Quality or a 1-gram shift in your dose can be the difference between a syrupy masterpiece and a cup of bitter battery acid.
The Holy Trinity: Dose, Yield, and Time
To calibrate an espresso, you must control three main variables. Think of these as the legs of a stool; if one is off, the whole experience collapses.
-
The Dose: This is the dry weight of coffee in your basket. In the modern era, we typically use 18g to 20g for a double shot. Consistency here is non-negotiable. If your dose fluctuates by even 0.2g, your resistance in the puck changes, and your “time” variable will go haywire.
-
The Yield: This is the weight of the liquid espresso in the cup. Forget about “ounces” or “milliliters”—we measure in grams. A standard starting point is a 1:2 ratio (e.g., 18g in, 36g out).
-
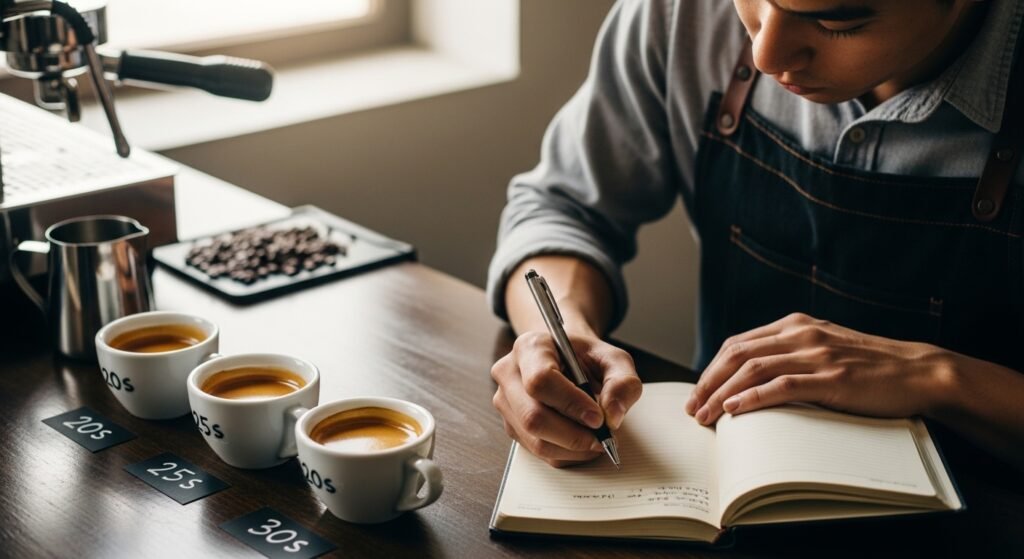
The Time: This is the duration of the shot, from the moment you pump the water to the moment you stop. Ideally, you are looking for a window between 25 and 32 seconds.
When you are trying to Develop a Professional Palate, you learn that these numbers are just a map. The destination is always flavor. If your shot hits the “perfect” numbers but tastes sour, the numbers don’t matter—the calibration isn’t finished.
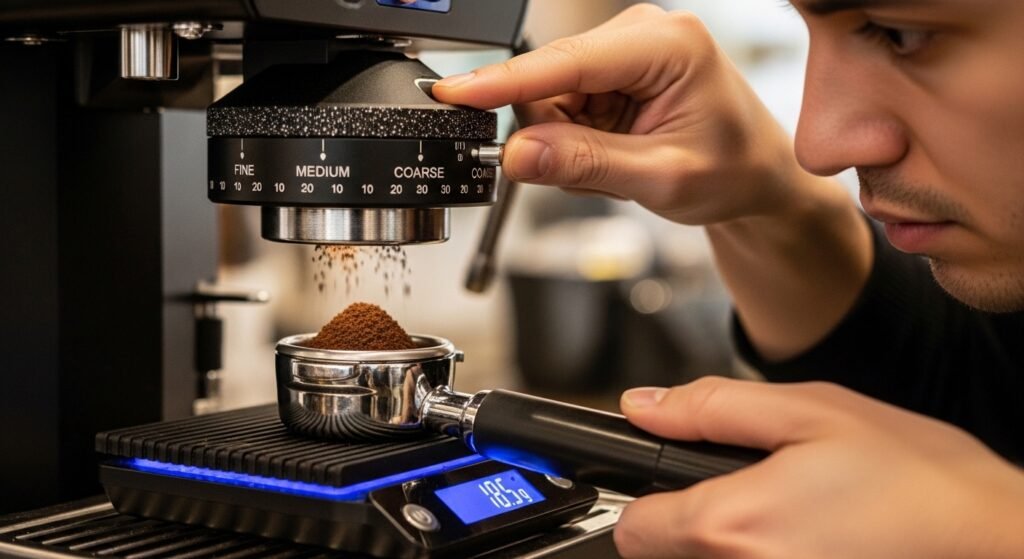
The Grinder: The Only Tool That Matters
I have said it before and I will say it again: Invest in the Grinder, Not the Machine. The grinder is the primary tool for dialing-in. When you adjust your grind size, you are changing the surface area of the coffee and the resistance the water faces.
-
Grinding Finer: Increases resistance, slows down the flow, and increases extraction (bringing more sweetness, but potentially more bitterness).
-
Grinding Coarser: Decreases resistance, speeds up the flow, and decreases extraction (bringing more acidity, but potentially more sourness).
In my decades of experience, I’ve seen that environmental factors—like the humidity in the room or the Volcanic Soils and High Altitudes where the bean was grown—will affect how the coffee “drags” in the grinder. This is why a barista must re-calibrate every single morning. The coffee you dialed-in yesterday is not the same coffee today.
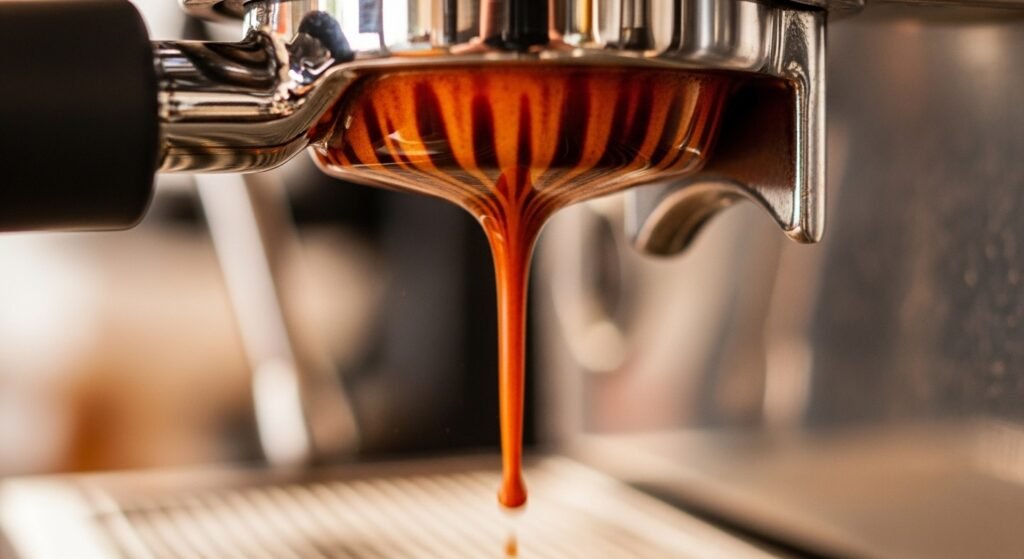
The Sensory Compass: Sour vs. Bitter
The most difficult part of the dialing-in process for beginners is distinguishing between “sour” and “bitter.”
-
Under-extracted (Sour): This happens when the water passes through too quickly or the grind is too coarse. It tastes salty, sharp, and disappears quickly from the tongue. It lacks the Science of Aftertaste that we look for in high-quality beans.
-
Over-extracted (Bitter): This happens when the water is in contact with the coffee for too long. It tastes ashy, dry, and “hollow.” It feels like it’s scraping the back of your throat.
A perfect “dialed-in” shot sits right in the middle. It has the “zing” of a Kenyan Slingshot but the sweetness of a caramel. It should feel heavy on the tongue, like heated honey.
Temperature and Pressure: The Hidden Variables
While dose, yield, and time are your primary controls, modern machines allow us to tweak temperature and pressure.
In my early days, we worked with a fixed 9 bars of pressure. Today, we use “pre-infusion”—gentle pressure at the start to soak the puck and prevent “channeling.” If your water hits a dry puck at full force, it will find cracks in the coffee and rush through them, leading to a shot that is simultaneously sour and bitter.
Temperature is equally vital. For a light-roasted Ethiopian bean, I might go as high as $94^{\circ}C$ ($201^{\circ}F$) to force out the stubborn sugars. For a darker roast, I’ll drop to $90^{\circ}C$ ($194^{\circ}F$) to avoid burning the delicate oils. As we discussed in Why Coffee Tastes Different When it Cools Down, the thermal energy you apply during extraction dictates the chemical “story” you are telling.
The “Dialing-In” Workflow: A Step-by-Step Guide
If you are standing at your machine right now, follow this 30-year veteran’s protocol:
-
Set your Dose: Pick a weight (e.g., 18g) and lock it in. Do not change this.
-
Pull a Shot: Aim for a 1:2 ratio (36g out).
-
Check the Time: Did it take 15 seconds? It’s too fast. Grind finer. Did it take 45 seconds? It’s too slow. Grind coarser.
-
The Taste Test: Once you hit the 25–30 second window, taste it.
-
If it’s sour: Increase your yield slightly (e.g., go to 38g or 40g out) or grind one notch finer.
-
If it’s bitter: Decrease your yield slightly or grind one notch coarser.
-
-
Repeat: Only change one variable at a time. If you change the grind and the dose simultaneously, you will never find the “sweet spot.”
Conclusion: The Pursuit of the God Shot
Calibration is not a chore; it is a conversation with the bean. It is how you respect the farmer who grew those High-Altitude African Coffees. When you finally “lock in” the grind, the temperature, and the yield, the result is what we in the industry call the “God Shot.” It is an espresso so balanced, so sweet, and so complex that it justifies all the wasted beans and the stained shirts.
After three decades, I still get a thrill when a new coffee arrives and I have to “find” its flavor. It reminds me that coffee is a living thing, reacting to the air, the water, and the hands that prepare it. Whether you are using a Siphon or an espresso machine, the principles of calibration remain the same: observe, taste, and adjust.
The next time you’re Hosting a Cupping at Home, remember that the same attention to detail you use for cupping applies to your espresso. Don’t settle for “good enough.” Dial it in until the coffee tells you its whole story.

Brown Christopher is 47 years old and has been passionate about coffee since he was 15. For more than three decades, he has explored coffee culture, brewing methods, and the flavors behind every cup. Through this blog, he shares simple tips and knowledge to help beginners better understand and enjoy coffee in their daily lives. ☕